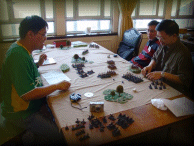
Saturday 22 October 2005
after action report
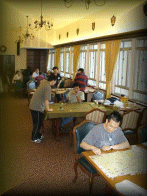
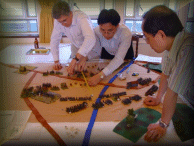
The Big Push
ATO
magazine game Nr.11 "The
Big Push": the major British offensive in the
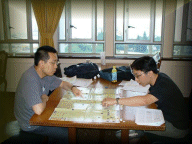
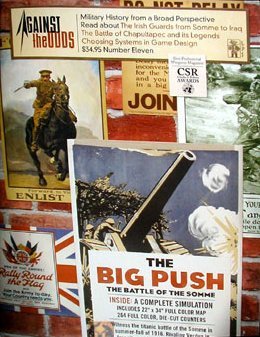 We
played the 4-turns scenario "Over the Top" as a learning
exercise. It took some time to
get used to the game system at the first place. So
we were just barely able to finish 3 turns in 5 hours. A
bit slower than I expected, primarily because, I think, of Roger Nord's
usual approach of introducing as many variables as possible into his
integrated design. A lot of
different die-roll modifiers have to be accounted for and calculated at
the time of resolving combats. Otherwise,
we were pretty much happy with the game's neat treatment of command
resources, where the British have more options than the Germans at the
Corps strategic planning level.
We
played the 4-turns scenario "Over the Top" as a learning
exercise. It took some time to
get used to the game system at the first place. So
we were just barely able to finish 3 turns in 5 hours. A
bit slower than I expected, primarily because, I think, of Roger Nord's
usual approach of introducing as many variables as possible into his
integrated design. A lot of
different die-roll modifiers have to be accounted for and calculated at
the time of resolving combats. Otherwise,
we were pretty much happy with the game's neat treatment of command
resources, where the British have more options than the Germans at the
Corps strategic planning level.
One
thing we tried to figure out initially was the use of the HQ for both
movement and combat. It is
because an HQ in command range and in command mode should be there for
assault commitments. At the
same time, they should be in supply mode when actual combat takes
place to avoid that nasty +2 DRM. Soon,
naturally we knew that the Brits had the advantage in the number of HQs
available! One HQ would allow
the Tommies to get close to assault. Another
HQ would supply them in combat.
 Speaking
of assaults, we were confused between assault, which is a normal one, and
close assault. In the latter,
defensive fire fire occurs before the attacker fires. While
close assault has a +1 DRM for EACH close assaulting unit to inflict
greater damage, we forgot to apply this one. We had all defenders getting
to fire first in a normal assault . . . I would have hoped that the rules
for assault should have clearly stated this, not only just a DRM
description on the Assault Results Table. The
Brits could have pushed the German back more. At
the same time, since we played it incorrectly on the close assault rule,
there was no point for the German to go over the top for a close assault,
given the fairly bloody combat results for the attacker.
Speaking
of assaults, we were confused between assault, which is a normal one, and
close assault. In the latter,
defensive fire fire occurs before the attacker fires. While
close assault has a +1 DRM for EACH close assaulting unit to inflict
greater damage, we forgot to apply this one. We had all defenders getting
to fire first in a normal assault . . . I would have hoped that the rules
for assault should have clearly stated this, not only just a DRM
description on the Assault Results Table. The
Brits could have pushed the German back more. At
the same time, since we played it incorrectly on the close assault rule,
there was no point for the German to go over the top for a close assault,
given the fairly bloody combat results for the attacker.
 So
the result is a false victory to the Germans . . . as the Allied could not
clear all the German units from the starting trench line. Actually,
despite rain-clear-drizzle weather, the Brits had done well in the centre
part of
So
the result is a false victory to the Germans . . . as the Allied could not
clear all the German units from the starting trench line. Actually,
despite rain-clear-drizzle weather, the Brits had done well in the centre
part of
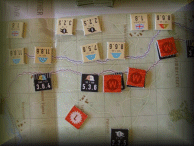
There
are no tanks in this scenario, so we didn't get to see the tank breakdown.
Replacement is calculated by
counting the number of assault steps lost and disordered units. Most
Allied units have 4-steps and the Germans have 3. Victory
points would go to the opposing side for each step replaced. Since
the Allied victory conditions hinge on territorial objectives and not VPs,
it is almost a wild spree for the German to get the replacements up and
running and sending 'em to the front via roads as soon as possible.
Overall,
we liked the game system. The
number of units and low stacking limit on the one map is very manageable
and we got used to movement on the square map grid (a very nice one by
Craig Grando) without problem. The
treatment of counter-battery fire is also fun. There
are 4 shorter scenarios (4 to 7 turns each) to choose from, dissecting
each segment in the campaign very well. Along
with the 21-turn campaign game, we will definitely give it another spin
sometime soon.
Lawrence Hung
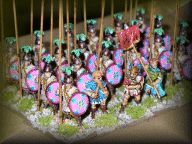
Warhammer Historical
Four battles of Warhammer Ancient
Battles were completed and, although we found that we had made many
mistakes in the games we had played before, all participants enjoyed this
interesting battle system simulation. Let everybody study their
mistakes so as to become familiar with the system. As noted before, the
game play was very fast with the four 1500 points battles being completed
within five and half hours.
Results:
 Game
1:
Game
1:
 Game 2: Macedonian (Philip Ngo) vs
Early Imperial
Game 2: Macedonian (Philip Ngo) vs
Early Imperial
 Game 3: Hundred Years War English (Cheung Kar
Fai ) vs Hundred Years
War French (Hermann Ng). They
recreated a battle of one of the greatest conflicts of the Medieval
Age, with the Warhammer Ancient Battles
supplement, Armies of Chivalry, in 15 mm scales, all figures being
provided by Kar Fai. Although
Game 3: Hundred Years War English (Cheung Kar
Fai ) vs Hundred Years
War French (Hermann Ng). They
recreated a battle of one of the greatest conflicts of the Medieval
Age, with the Warhammer Ancient Battles
supplement, Armies of Chivalry, in 15 mm scales, all figures being
provided by Kar Fai. Although
Game 4: Macedonian (Christopher
Chu) vs Barbarian (Hermann Ng). The Macedonians won by making a
successful charge against the Barbarian warbands with their Thessaly
Cavalry. Moreover
Christopher
Chu
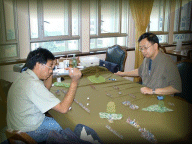
DBMM
 Two
battles of Bosworth 1485 being fought to conclusion using Tony Mathews
superbly painted 28mm War of the Roses figures (when are you going to
flock those bases Tony?).
Two
battles of Bosworth 1485 being fought to conclusion using Tony Mathews
superbly painted 28mm War of the Roses figures (when are you going to
flock those bases Tony?).
The first battle saw a historical defeat of Richard III (Tony) and his brothers in arms, Northumberland (Derek Townshend) and Norfolk (Andrzej) at the hands of Henry (Eric), Pembroke (Peter Munn) and Oxford (Ken), with wily old Stanley (Jeff) sitting on the hill and never joining the battle.
In the second round, players switched sides with Jeff taking over as Richard and Ken sitting on the sidelines as Stanley. This time the Yorkists carried the day, although Richard fell in battle at the hand of the Tudors, shortly after Stanley had thrown his lot in with the Lancastrians.Andrzej Cierpicki
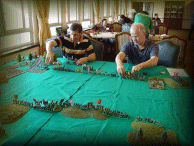
Napoleon's Battles
 The hard
fought battle of Salamanca, in 15mm, with the Allies eventually carrying
the day after some fierce fighting in the centre.
The hard
fought battle of Salamanca, in 15mm, with the Allies eventually carrying
the day after some fierce fighting in the centre.
Participants were Lawrence Ho and Glenn Haley as the Allies, and James Cheung and Lee Tai Wah as the French.